Adobe – MAC installation
Attention: Before you start the installation process, you need to make sure that no older versions of Adobe are installed on your computer. If any older versions remain, you need to remove them based on the instructions found here.
1. Download the Adobe Cleaning Tool
Click here to download the tools you need to install Adobe.
You will need to log in here with your Tækniskóli account.

Note : If you don’t know your Tækniskóli account then click here
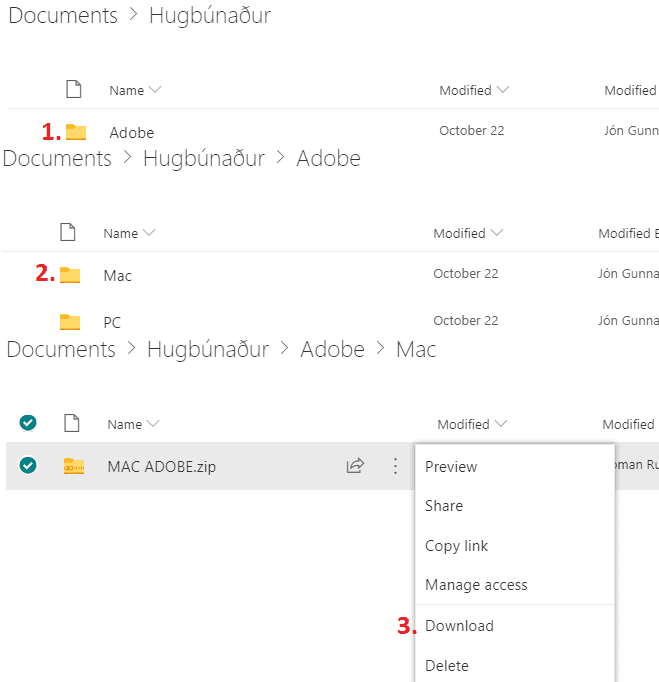
Open the “Adobe” folder, open “MAC” and click “Download” on the “MAC ADOBE.zip” file.
2. Unzip the folder
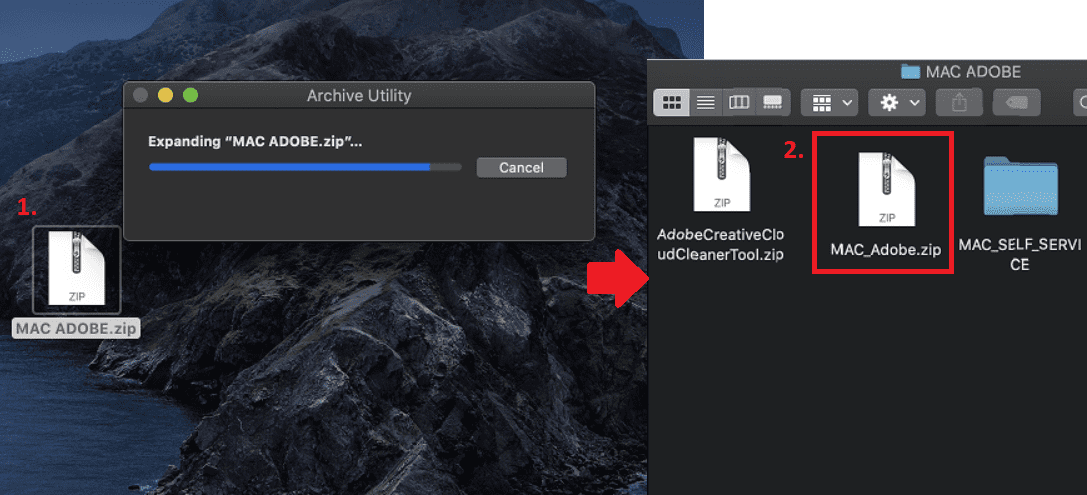
Start by unzipping the “MAC ADOBE” folder. After that you also need to unzip the “MAC_ADOBE” folder. This can be done by double clicking the appropriate .zip file.
3. Allow changes from apps from outside App Store
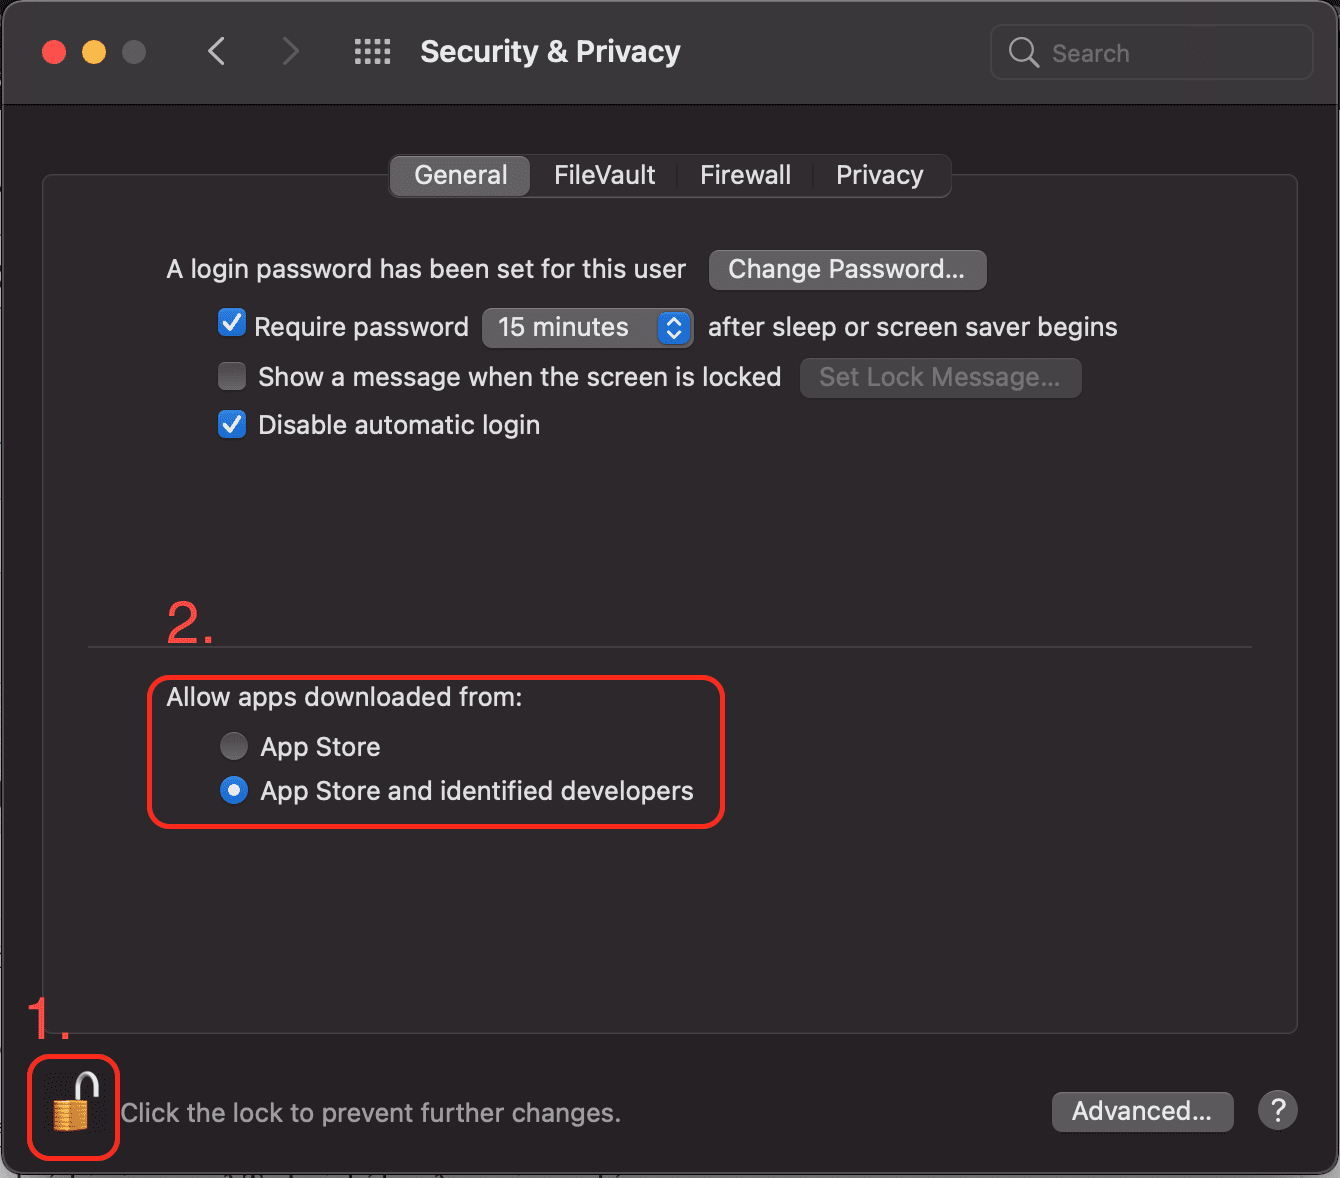
In order to be able to install apps from the outside, like Adobe, you will need to go to System Preferences and, from there, go to Security & Privacy.
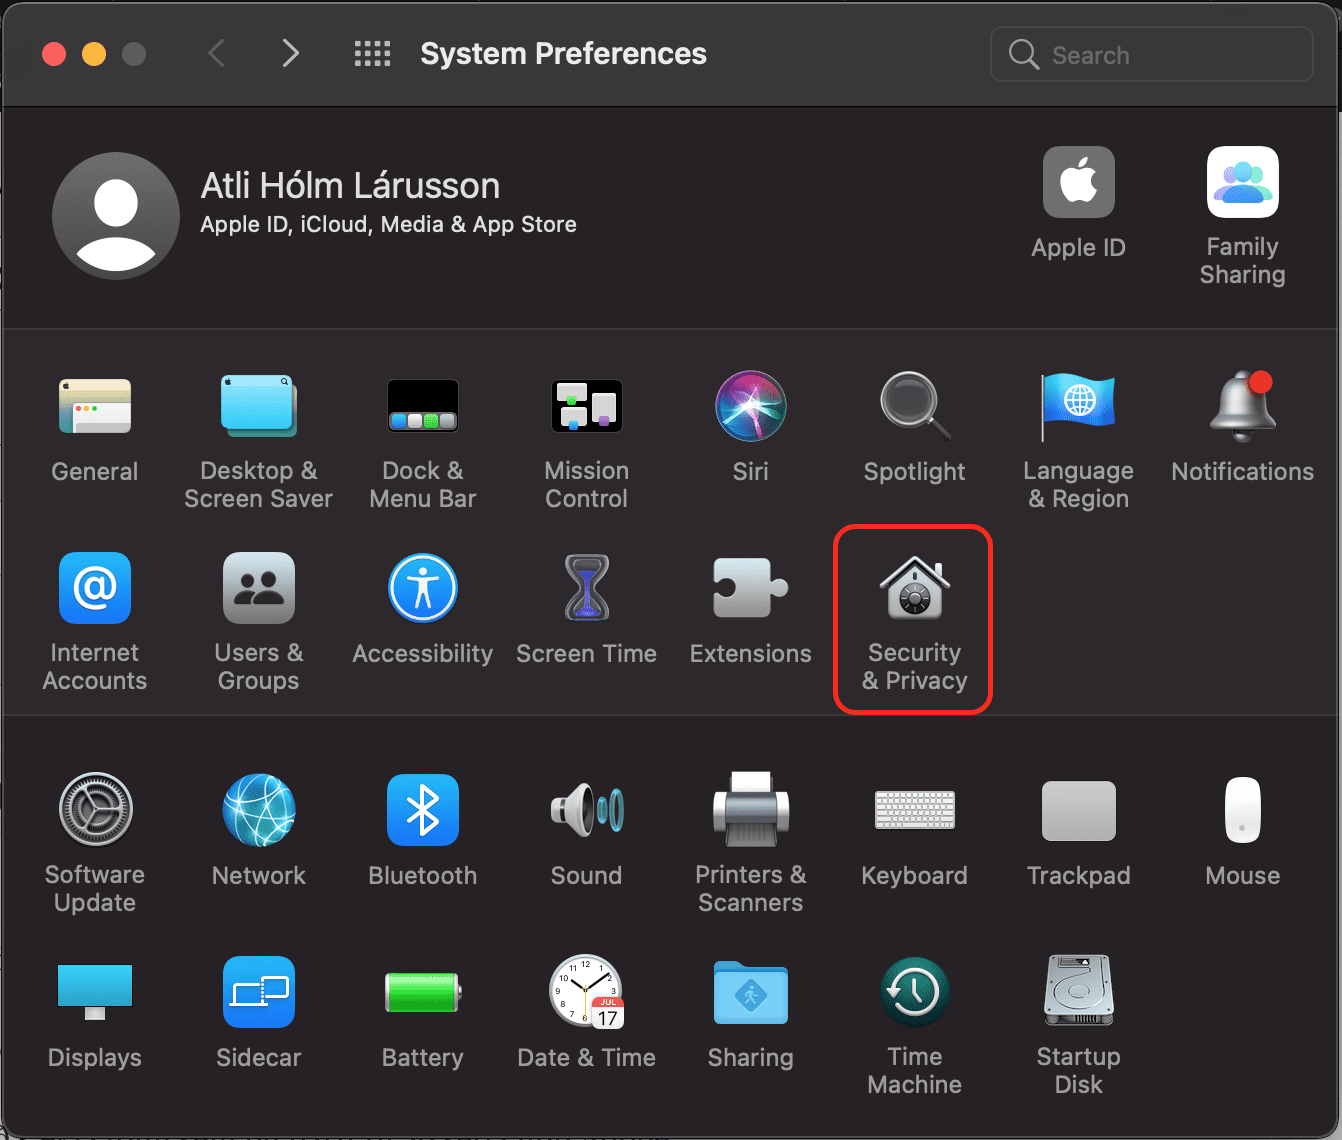
After this you need to click on the lock at the bottom of the screen to allow changes to the settings. You will then be prompted to enter the password to the computer. Finally, check the App Store and identified developers checkbox and apply your changes.
4. Run the installation
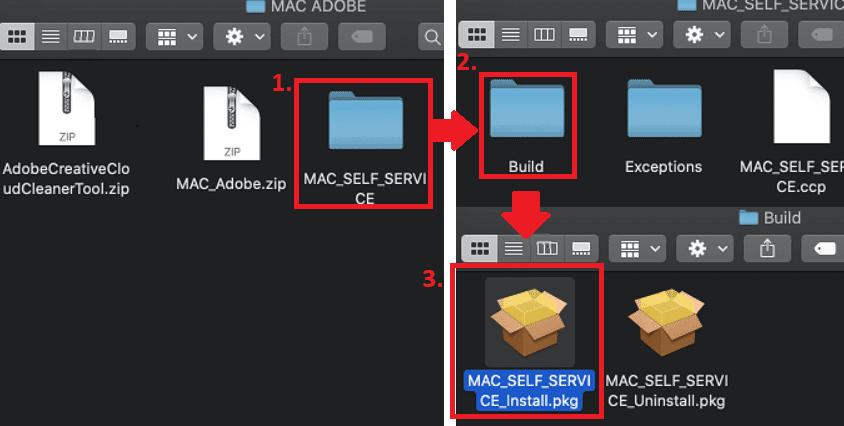
In the “MAC_SELF_SERVICE” folder, go to “Build” and run the “MAC_SELF_SERVICE_Install.pkg” file.
Note : In the Catalina version of MacOS there is a possibility that you can’t click the “Continue” button. If this happens, restart the computer and try running the file again. If you get “Installation failed” then you might need to update your operating system.
5. Log in to Creative Cloud
Once the installation is finished, open the “Adobe Creative Cloud” app. In the “email address” field write “tskoli.is” and click “Continue”. You will be redirected to a new login windows where you need to use your Tækniskóli account”.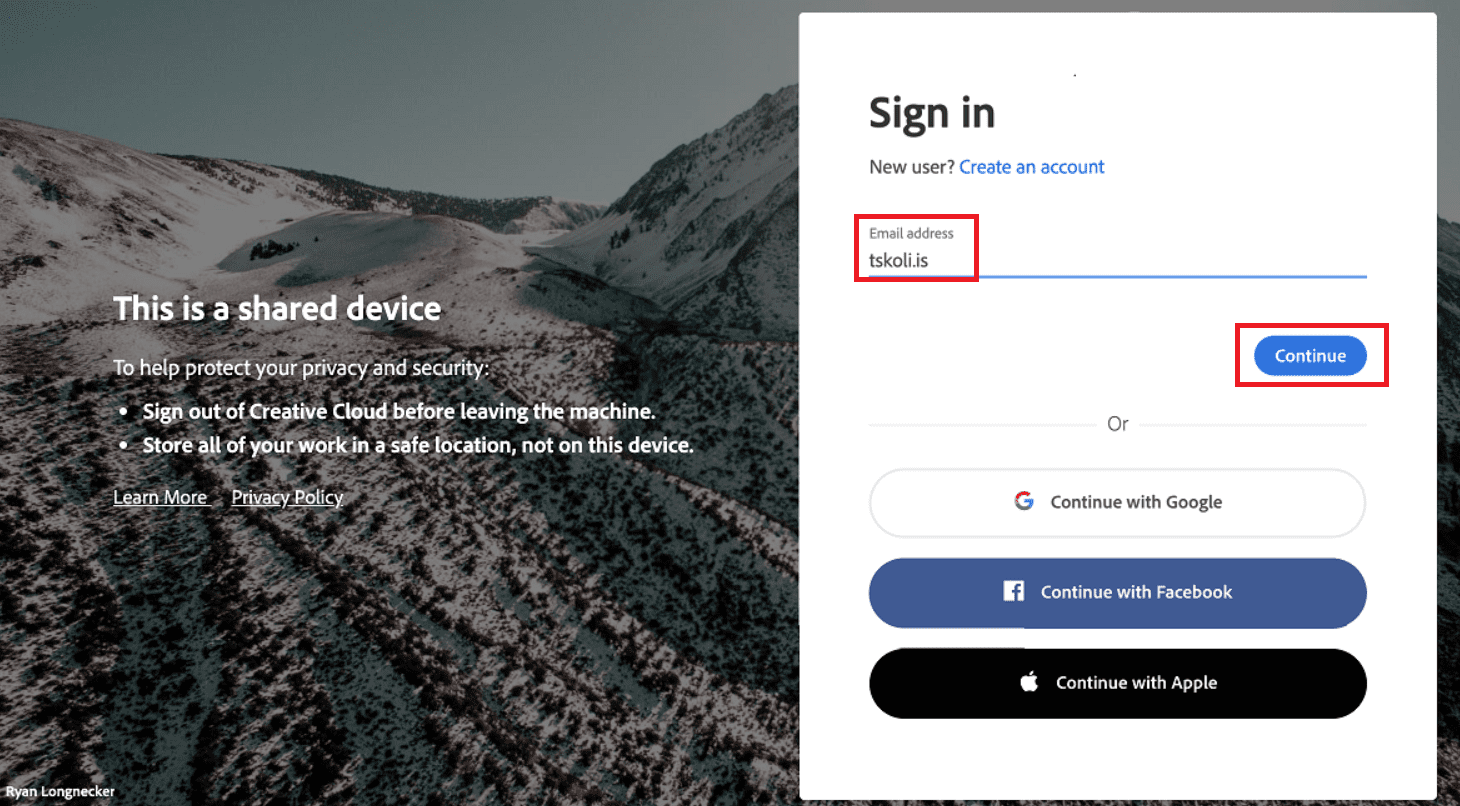

6. Install Adobe apps
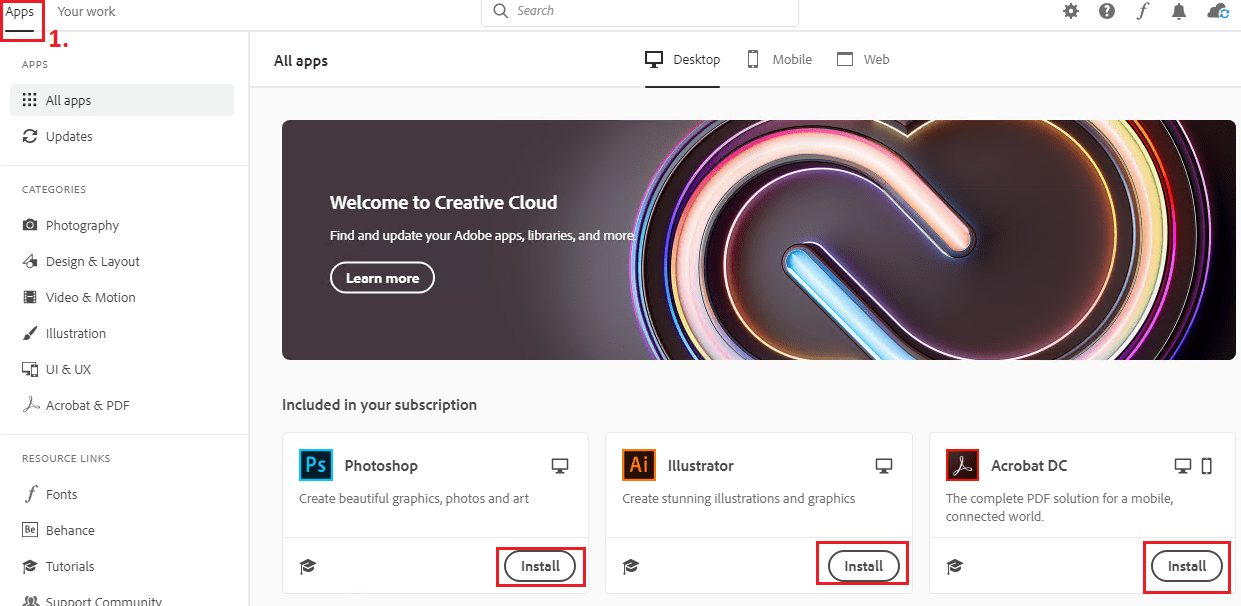
In this window you can go to “All Apps” and download the Adobe apps that you want.
