Adobe – MAC set up
NOTE: Before starting the installation process, make sure that there are no older versions of Adobe programs on the computer. If older versions are present, they must be removed first by following the instructions here.
What Processor is in your computer?
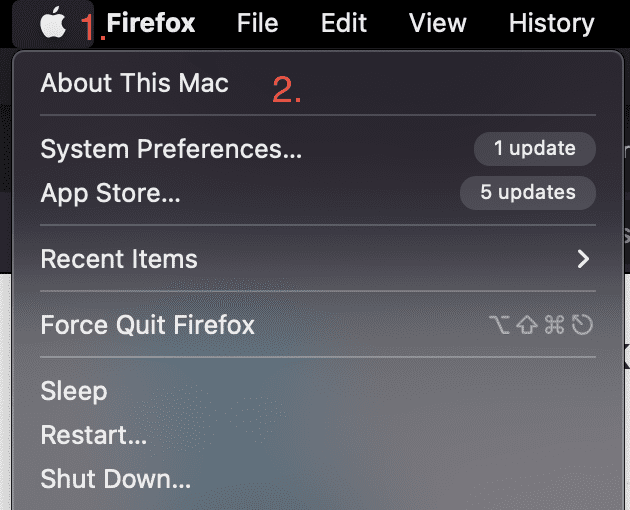
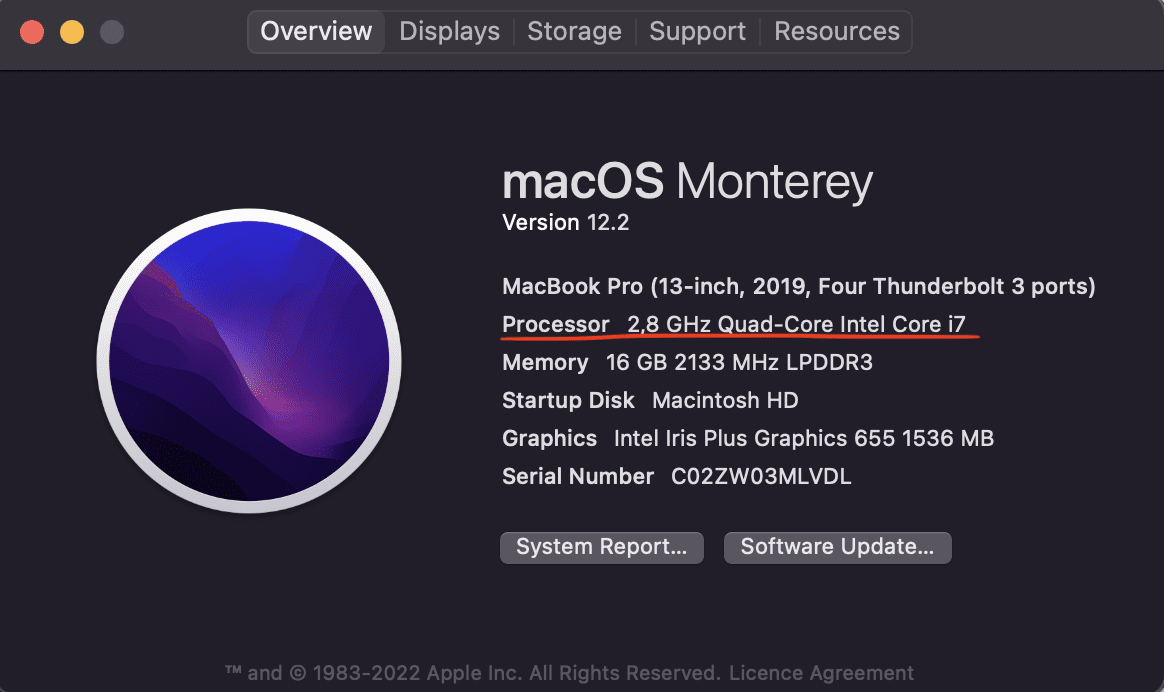
First you need to know which processor is in your computer. To find it you go to the top left corner of your screen and click on the apple, there you click on “About this Mac”. Under the Overview window there you can see which “Processor” is in the computer, for example the image below shows an Intel Core processor.
1. Get the Adobe installer
Click here to download the tools you need to install Adobe.
Here you need to log in with your Technical School account.

NOTE: If you do not know your Technical College login, click here
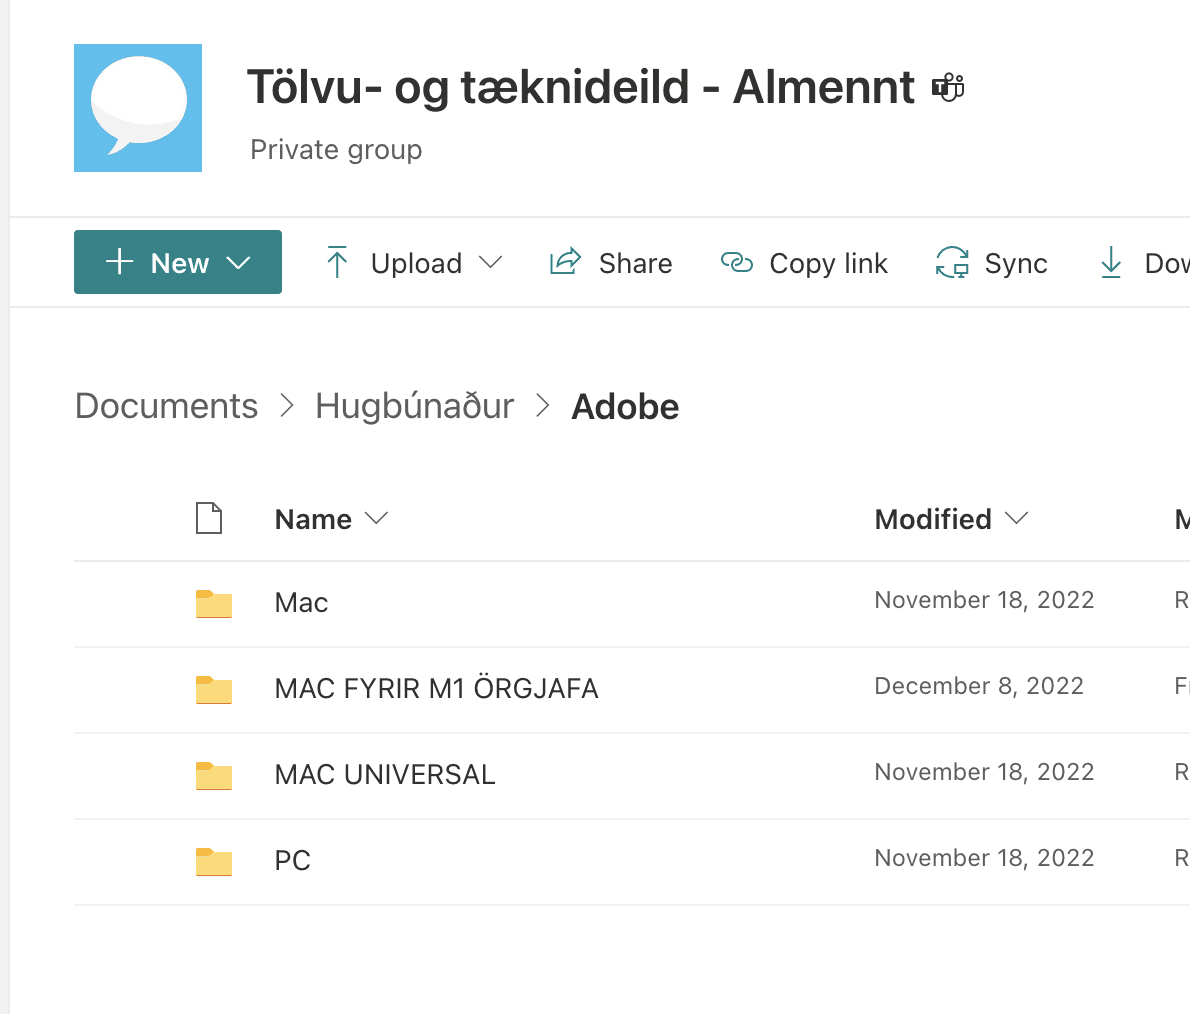
Open the “Adobe” document, there you will see four folders, you choose a folder depending on which processor your computer has;
1.Intel Core processor, then you select the folder called “Mac”
2. Apple M1 processor, Then you select the folder called “Mac fyrir M1 örgjafa”
3. Apple M2 processor, then you select the folder called “Mac Universal”
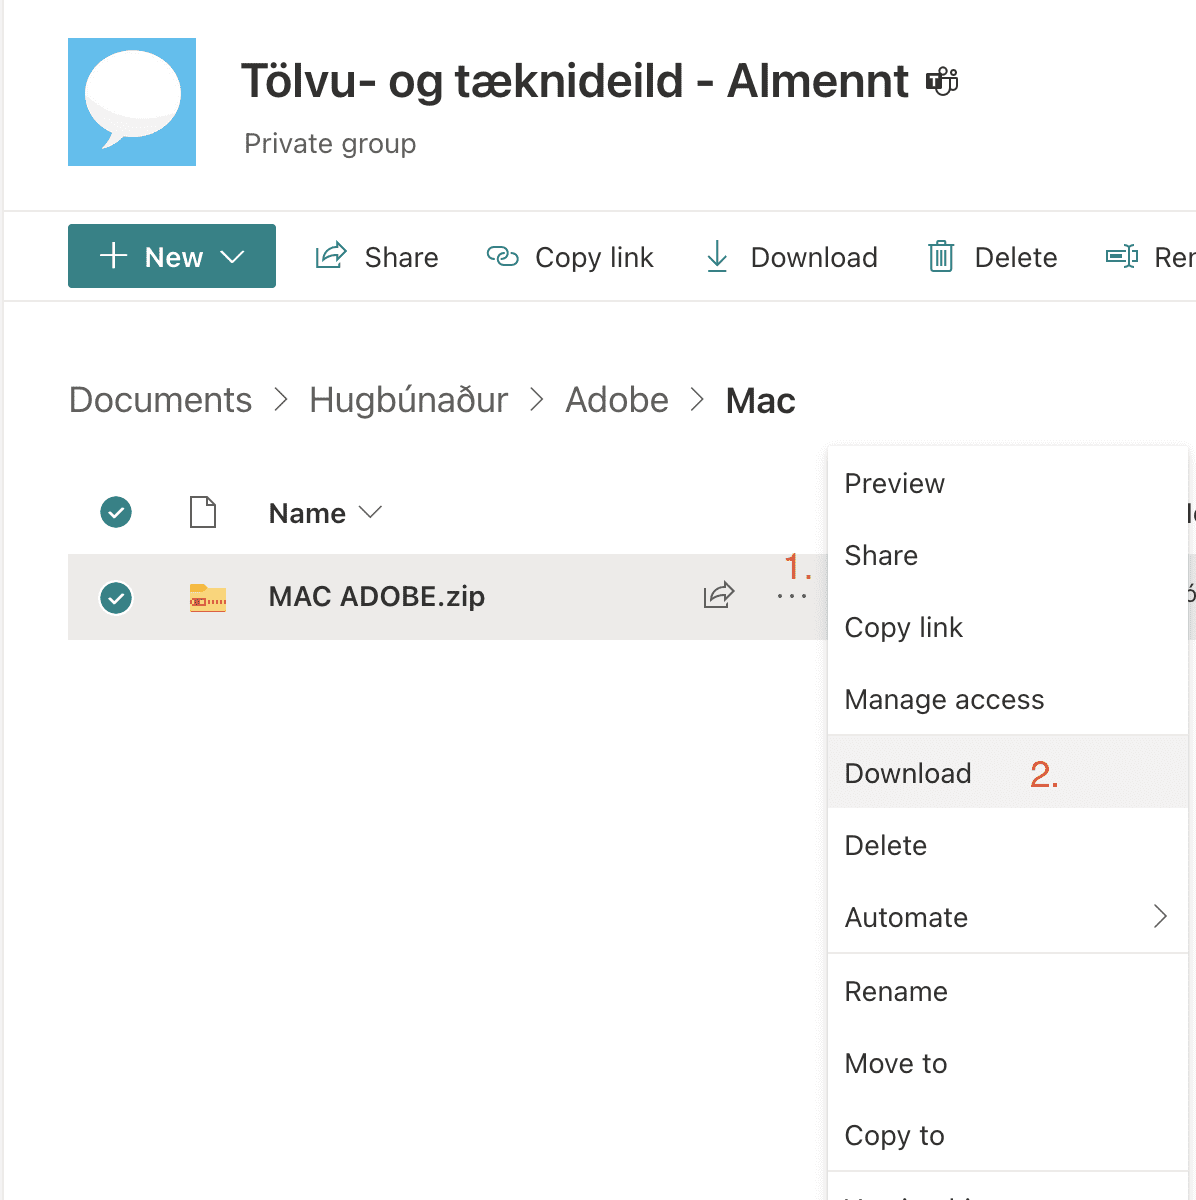
Next you can double click on the folder you choose and when you get there you can press the three dots and select “download”
2. Unzip the folder
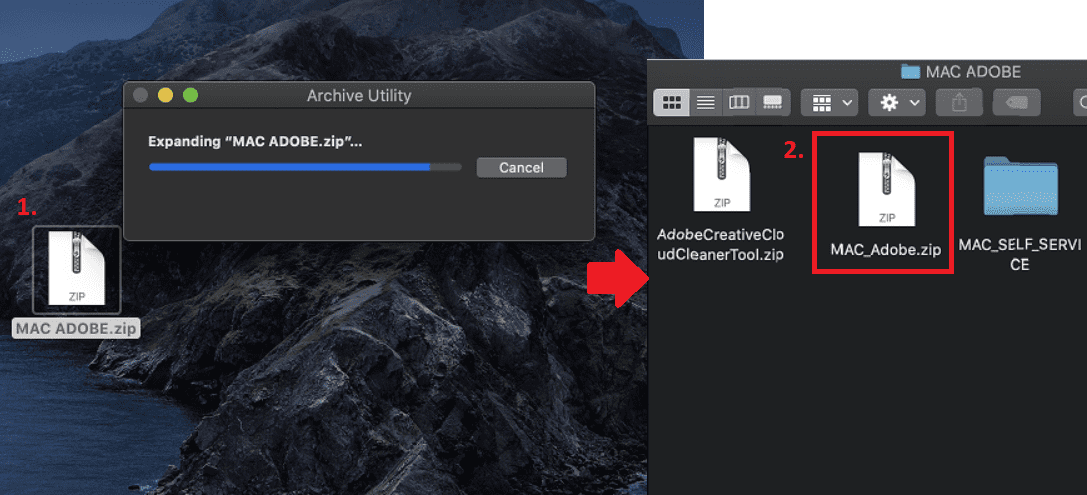
Start by unzipping the folder you just downloaded by double-clicking on it.
In it you also need to unzip the folder called MAC_Adobe.zip, MAC_M1.zip or MAC_Universal.zip depending on which processor you have.
3. Enable installation of external applications
In order to be able to install external applications, such as the Adobe suite, you need to give permission to the computer.
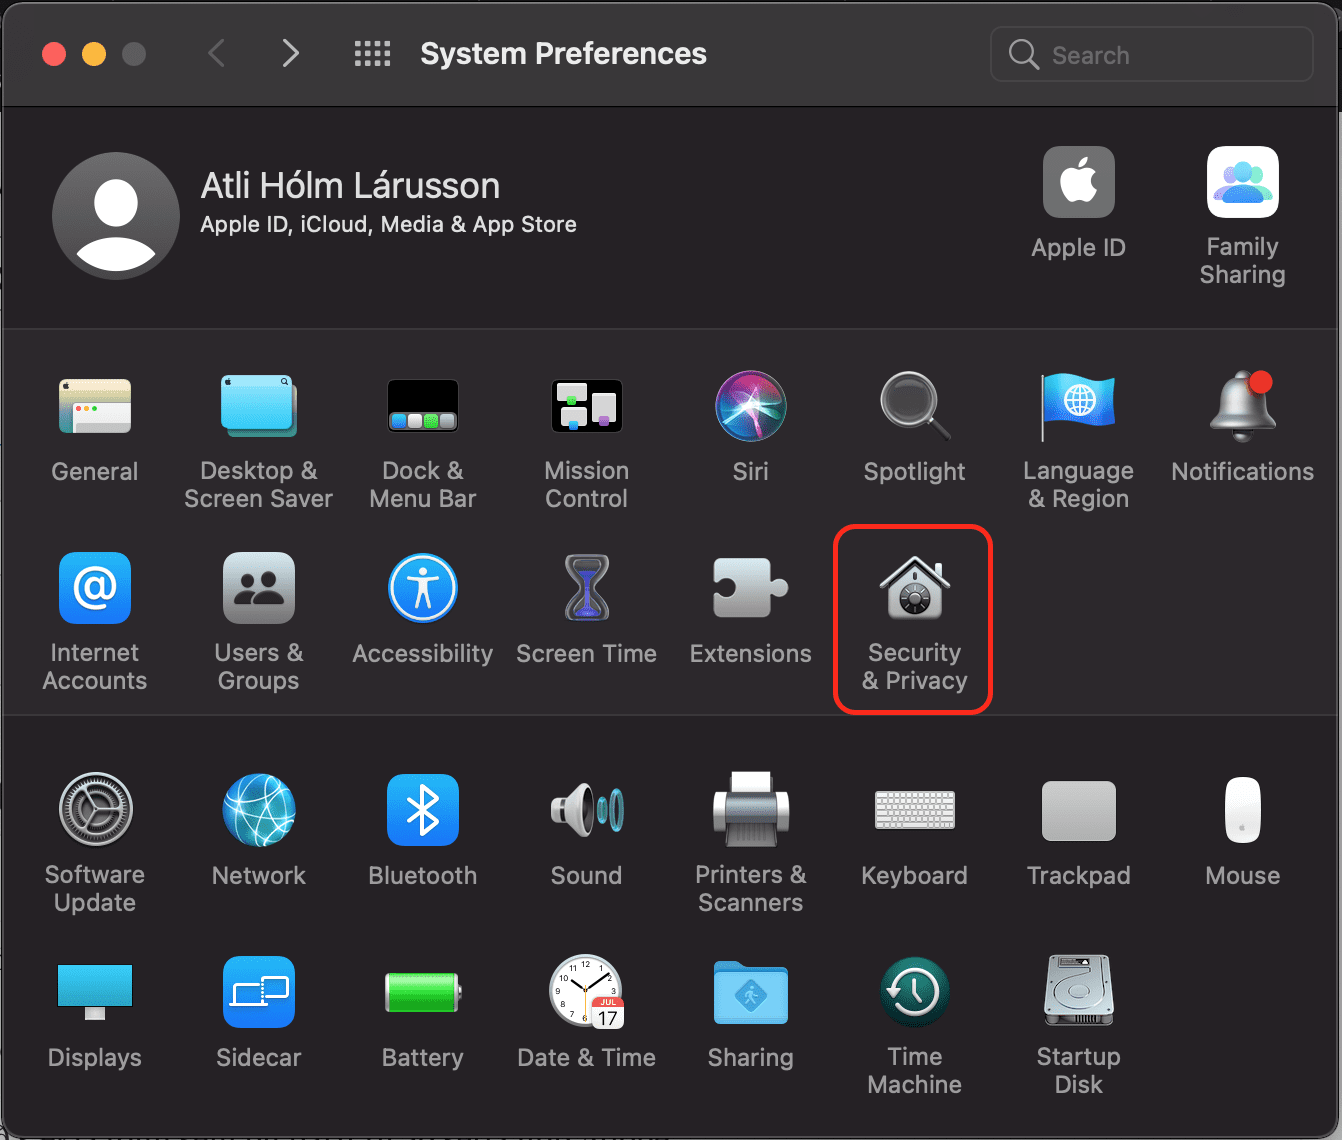
It is best to go to System Preferences by pressing the command key and the space bar at the same time and write there “system preferences” and then click on Security & Privacy.
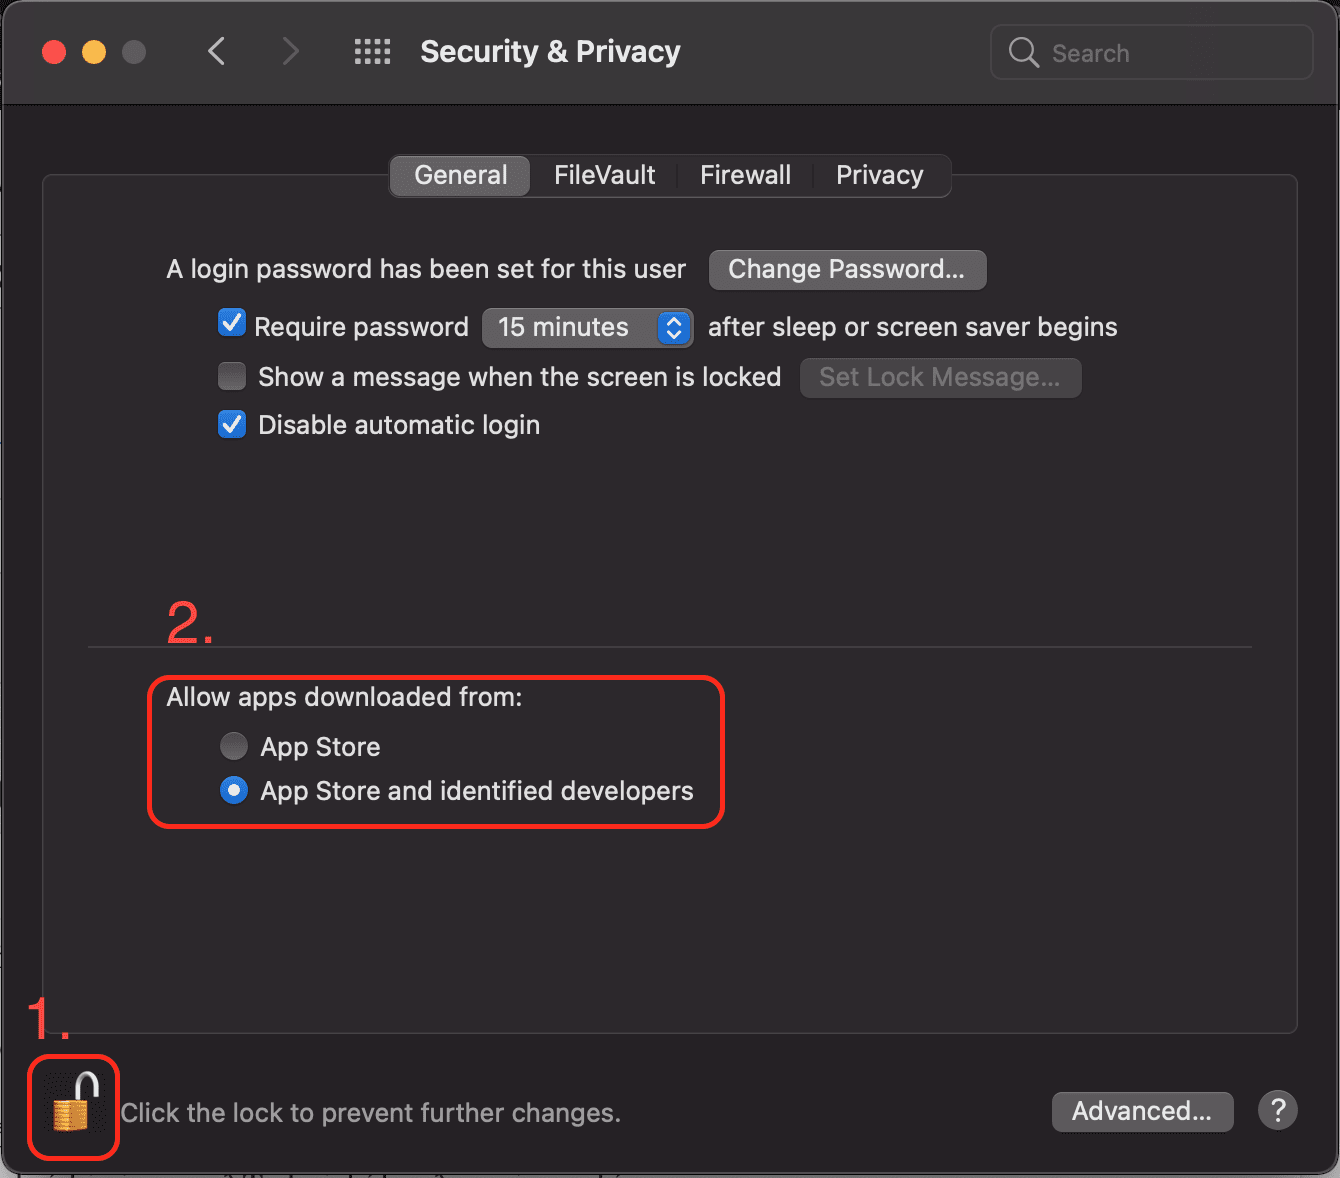
Once there, you need to go to the General window at the top and then click on the lock at the bottom of the window to allow changes. You have to enter the password for the computer here. Finally, check “App Store and identified developers” to allow changes from external applications.
4. Run the setup
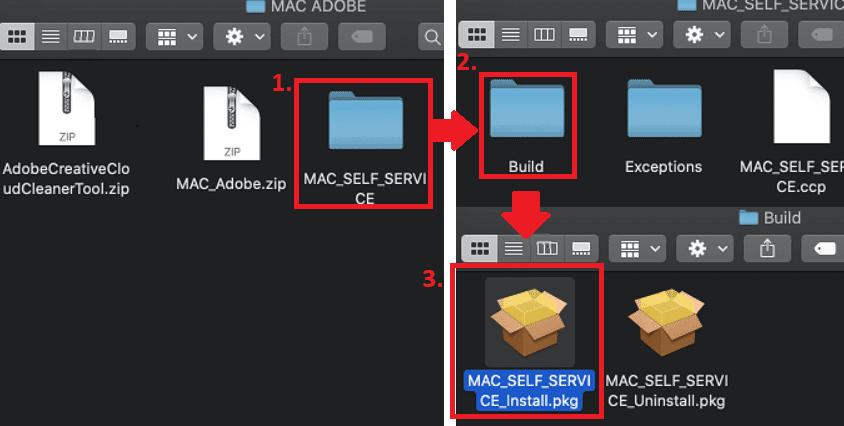
In the “MAC_SELF_SERVICE” folder you have to go to “Build” and then run the “MAC_SELF_SERVICE_Install.pkg” program.
NOTE : In the Catalina operating system, there has been a bug that means that it is not possible to press the “Continue” button. If you encounter this, restart your computer and try running the document again. If you get “installation failed”, your operating system may need to be updated.